Marking Hands in Hand2Note

Hand2Note allows you to create and apply various tags to already played hands, as well as to organize, export and provide them in a visual form.
Creating custom tags for hand marking in Hand2Note
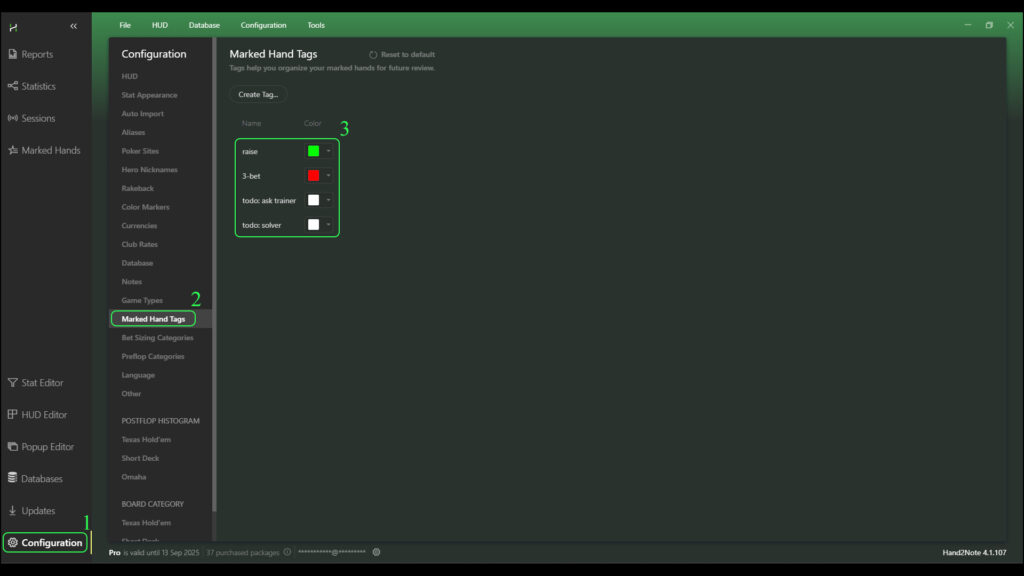
Right after installation, Hand2Note already has basic tags for marking hands (3), you can see them by opening the main program window: “Configuration” (1) and then go to the “Marked Hand Tags” tab (2):
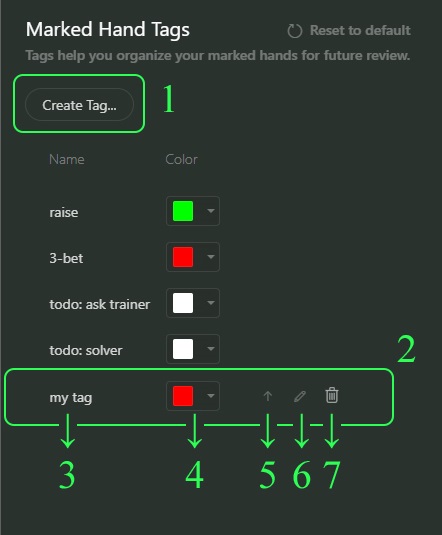
To create your own tag, click on “Create Tag…” (1). Immediately after clicking on “Create Tag…”, a tag named “my tag” will appear at the bottom of the tag list (2).
By hovering over the “my tag” area (2) you will be presented with tools to edit it:
- You can change the position of the tag in the list by clicking on the arrow symbol (5);
- You can change the color of the tag by clicking on the colored square (4);
- You can change the tag name by double click on the area (3) or by clicking once on the area (6);
- You can delete a mark by pressing the area (7).
Different ways of marking hands
You can mark hands in Hand2Note in two situations:
- At the moment of playing at the table;
- Outside the table.
In the same way, it is possible to mark a hand by two methods:
- Using the tag;
- With no tag.
Marking hands at the moment of playing at the table
You can mark the necessary hand in a process of the game immediately after its completion (during the hand that follows it) by pressing hotkeys:
- “F5” – mark the last played hand at the table without using the tag;
- “F6” – mark the last played hand at the table using the tag.
In order to change the hot keys to the preferred ones: Open “Configuration” (1), go to the “HUD” menu (2), scroll down to the “Hot Keys” column (3), and change the parameters:
- “Mark last hand key” (4) – sets the hotkey for marking the last hand played at the table without using the tag;
- “Mark last hand with tags key” (5) – sets the hotkey for marking the last hand played at the table using the tag.

Marking hands outside the table
You can mark the necessary hand outside the table either in the “Sessions” section or in the “Reports” section – by finding it in either of them in the list of hands (“Hands”):
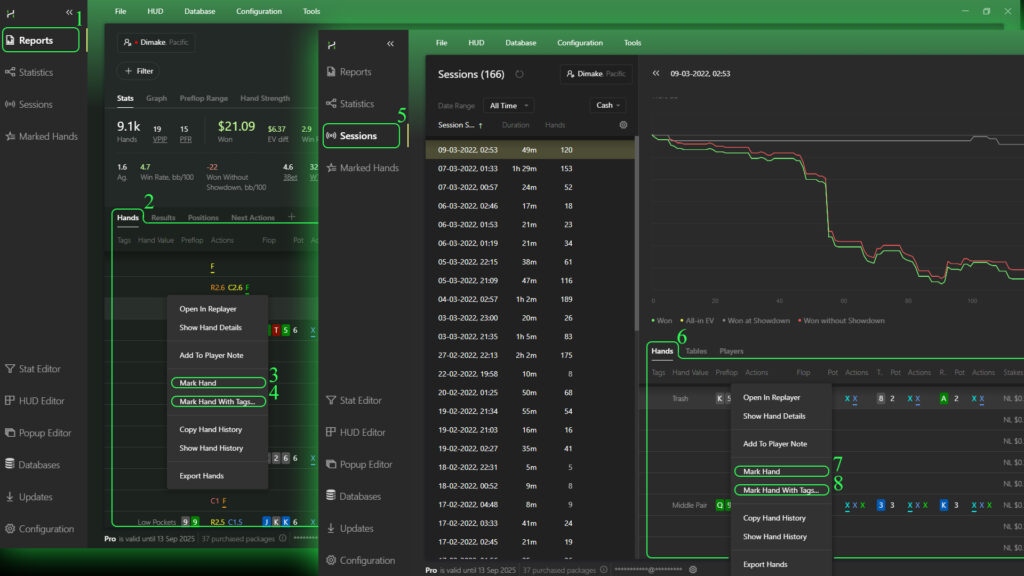
- For “Reports” section: In the main Hand2Note window open the “Reports” menu (1), find the hand you want to mark in the “Hands” list (2) and usd RMB (right mouse button). In the drop-down list choose how you want to mark the hand:
- Without using the tag – by clicking on “Mark Hand” (3);
- Using a tag – by clicking on “Mark Hand With Tags…” (4).
- For “Sessions” section: In the main Hand2Note window open the “Sessions” menu (5), find the hand you want to mark in the “Hands” list (6), and right-click on it. In the drop-down list, choose how you want to mark the hand:
- Without using the tag – by clicking on “Mark Hand” (7);
- Using a tag – by clicking on “Mark Hand With Tags…” (8).
View, sort and export marked hands to Hand2Note
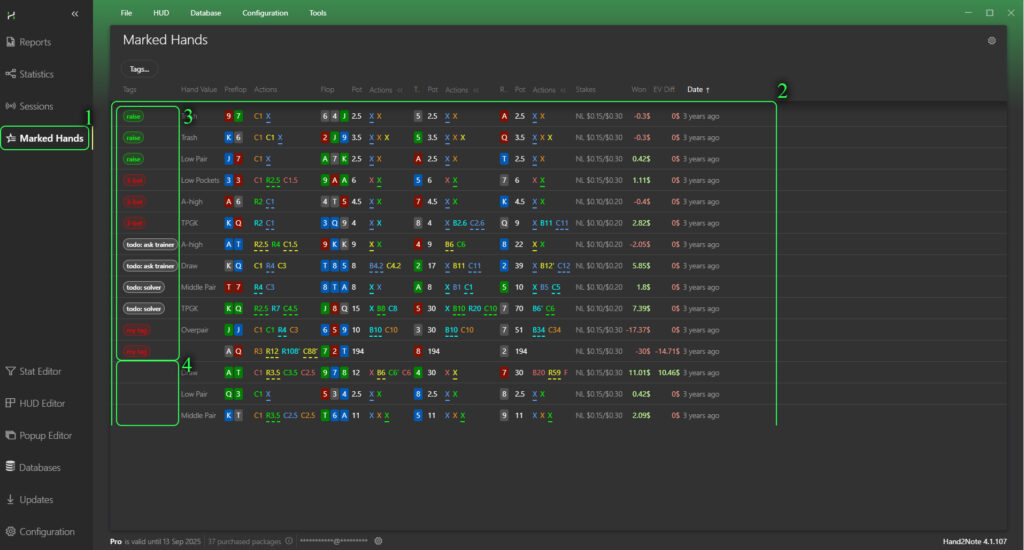
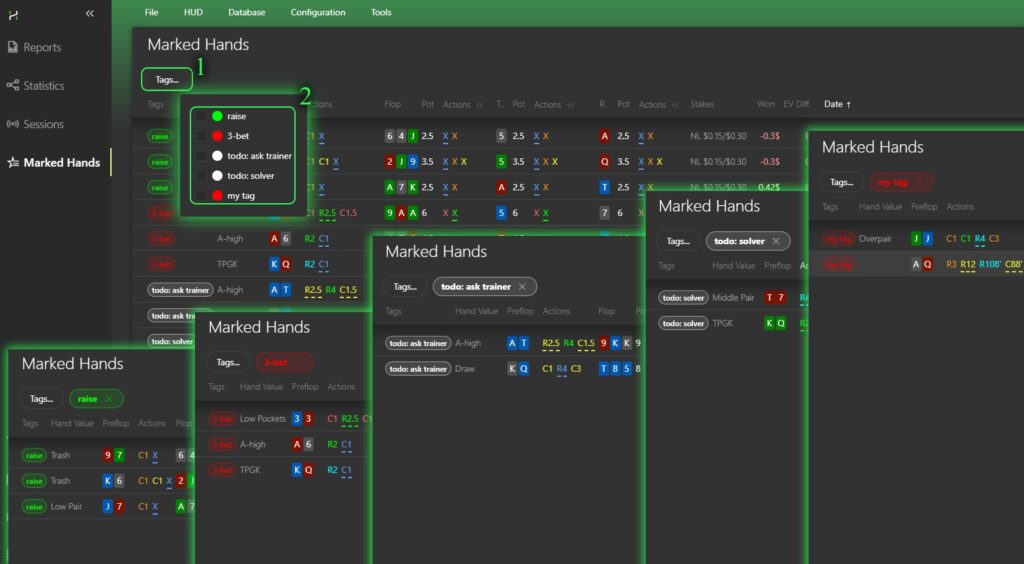
To view all marked hands, you need to select “Marked Hands” in the main Hand2Note window (1). In the opened list you can see all marked hands (2). Also, if you pay attention to the beginning of each line, you can see the tags (3) that were assigned to them or the absence of tags (4) – for the hands that were marked without tags.
In order to sort hands by tags, you need to click on “Tags…” (1) and in the drop-down list mark the necessary tags for displaying (2).
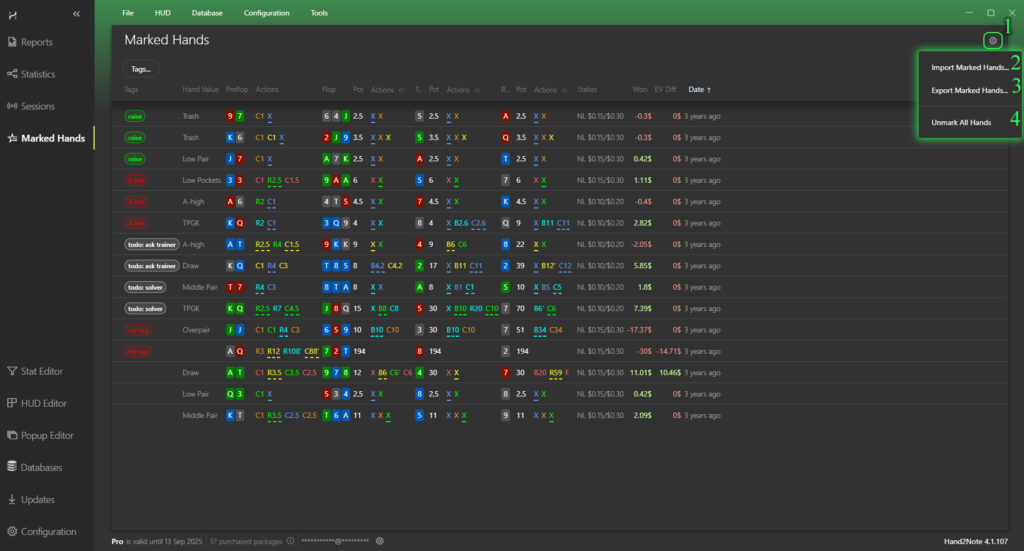
By pressing the gear symbol (1) in the upper-right corner, the following functions will be available:
- “Import Marked Hands…” (2) – import hands from text files to the “Marked Hands” section;
- “Export Marked Hands…” (3) – export hands from the “Marked Hands” section to text files;
- “Unmark All Hands” (4) – unmarks all hands from ‘Marked Hands’ and removes them from the section.
Latest guides
-
 Exploit Basics: Passive Player Profile Apr 9, 2026
 -
Hand2Note Popup Editor: Creating a Professional Popup Mar 28, 2026
-
Hand2Note Pro Pricing Reduced in 2026 Mar 19, 2026
-
How to Analyze Fish Ranges: Limp, Limp-Raise, and Limp-Fold Mar 13, 2026
-
Hand2Note Popup Editor: Creating a Simple Popup Mar 10, 2026


We regularly publish new Hand2Note 4 guides on our Discord server.
Join Discord Server